PledgeCents Widget Documentation - v1.0.0
Latest Version: 1.0.0
Table of Contents
Authentication
Every request from the PledgeCents Widget is validated with the unique API key given to each of our partners.
Adding the Widget to Your Page
The PledgeCents widget is the fastest and easiest way to give your users access to fundraising for your producs and/or services!
Adding the PledgeCents widget to your page is as simple as pasting a few lines of JavaScript and HTML into your page and configuring four simple options.
The JavaScript
To get started, paste the JavaScript to the right of this text into whichever page you'd like to add the widget to. Replace the string highlighted in yellow with your unique API key.
This will load all of the scripts and styles needed to display the PledgeCents widget, and make it fully interactive for your users.
If you do not yet have your unique API key, contact info@pledgecents.com.
<script>
  (function() {
      function async_load(){
          var pcDapperScript = document.createElement("script");
          pcDapperScript.type = "text/javascript";
          pcDapperScript.async = true;
          var pcDapperScriptSource = "https://pledgecents.com/js/dapper.min.js";
          pcDapperScript.src = pcDapperScriptSource;
          var existingScript = document.getElementsByTagName("script")[0];
          existingScript.parentNode.insertBefore(pcDapperScript, existingScript);

          var pcWidgetScript = document.createElement("script");
          pcWidgetScript.type = "text/javascript";
          pcWidgetScript.async = true;
          var pcWidgetScriptSource = "https://pledgecents.com/js/widget/v1/cause.js";
          pcWidgetScript.src = pcWidgetScriptSource;
          //Change the value of api_key to your api key
          pcWidgetScript.setAttribute("api_key", "ya5rh64086KWj0CBMibh");
          existingScript.parentNode.insertBefore(pcWidgetScript, existingScript);
          pcWidgetScript.id = "pledgecents-page-creation-embed";
      }
      if (window.attachEvent) {
          window.attachEvent("onload", async_load);
      }
      else {
          window.addEventListener("load", async_load, false);
      }
  })();
</script>
The HTML
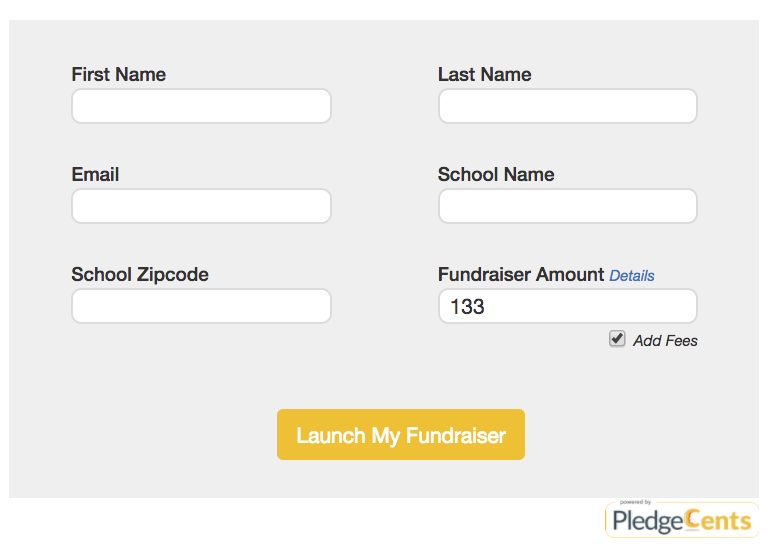
The HTML code to the right of this text will be the widget container. The widget will appear wherever you paste this code.
This is where all your widget configurations will happen. The attributes in the code sample (data-price, data-product-name, etc.) will allow you to display the name and price of the product or service you're making available for fundraising.
If the product or service that the user will be selecting won't be known until after page load, have no fear! PledgeCents has provided options for programmatically setting or changing the price and name of your product or service in our widget.
If you would like the constrain the size of the widget, you can apply a width, height, or both to the widget container. If you would like to hide the widget until a certain event is triggered, you can alter the display property of the widget container.
<div id="pledgecents-fundraiser-widget-container"
	data-price="100"
	data-product-name="Deluxe Account (12 months)"
	data-details-enabled="true"
	data-goal-enabled="false"
></div>
Configuring Widget Options
This is the fun part! The PledgeCents widget comes pre-packaged with four options to give you more control over how your users interact with the widget, and to fully integrate it into your site.
Setting the Price
One of the most important settings on the widget is the price. This will control what goal is set for your user's fundraiser! There are several different ways the price can be set for the widget.
The simplest way to set the goal amount for your user's fundraiser is to set it as the value for the data-price attribute, as seen on the right. If you replace the highlighted text with the price of your product or service, it will immediately have all applicable fees calculated and added on, and will be shown as the original price in the detail view.
This is the best option to use when you know the price of the product or service your user desires when the widget first loads. For example, on a checkout page.
<div id="pledgecents-fundraiser-widget-container"
	data-price="100"
	data-product-name="Deluxe Account (12 months)"
	data-details-enabled="true"
	data-goal-enabled="false"
></div>
Programmatically (Post-load)
If you need to add or adjust the price of your user's fundraiser after the widget has loaded, the PledgeCents widget provides a public function to allow you to easily make as many price adjustments as needed.
The setNewPledgeCentsFundraiserGoal function takes in the desired initial fundraiser goal amount (before any fees have been added) as a number, calculates and adds all applicable fees and updates the widget to reflect the change. This function can be called from anywhere within your JavaScript code.
setNewPledgeCentsFundraiserGoal(100);
No Price Set
If you don't want to set a goal amount for your user's fundraiser, you won't be required to. If data-price is left empty, and setNewPledgeCentsFundraiserGoal is never used, the user will be free to enter any goal amount they choose.
Warning: this option is not recommended. If no initial or suggested fundraiser goal amount is set, there is no guarantee that the user will choose to raise enough funds to have access to your product or service.
<div id="pledgecents-fundraiser-widget-container"
	data-price=""
	data-product-name="Deluxe Account (12 months)"
	data-details-enabled="true"
	data-goal-enabled="false"
></div>
Setting the Product Name
The product name is the name of the product or service that the user will be fundraising for.
On Load
Much like the fundraiser goal, the simplest way to set the product name that will appear in the widget's detail view is by setting it as the value of the widget container's data-product-name attribute, as seen on the right.
<div id="pledgecents-fundraiser-widget-container"
	data-price="100"
	data-product-name="Deluxe Account (12 months)"
	data-details-enabled="true"
	data-goal-enabled="false"
></div>
Programmatically (Post-load)
If you do not know what product the user will be fundraising for when the widget first loads, the PledgeCents widget provides a public function to change or update the product name.
The setNewPledgeCentsFundraiserProductName function takes in the desired name as a string and can be used from anywhere within your JavaScript code.
setNewPledgeCentsFundraiserProductName("Deluxe Account (12 months)");
No Product Name Set
If no product name is set, the default name displayed in the widget's detail view will be the name of the PledgeCents partner.
<div id="pledgecents-fundraiser-widget-container"
	data-price="100"
	data-product-name=""
	data-details-enabled="true"
	data-goal-enabled="false"
></div>
Enabling/Disabling Detail View
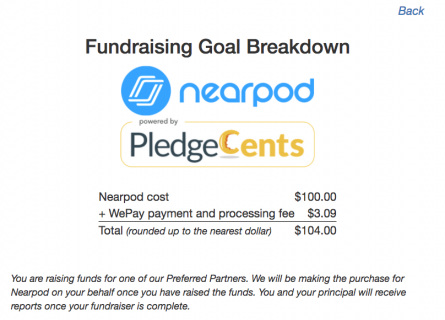
The widget's detail view is where the user can see a breakdown of all the fees associated with their PledgeCents fundraiser.
Details Enabled (Recommended)
Enabling detail view is highly recommended so that users can see a line by line breakdown of where the funds they raise will go.
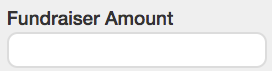
When detail view is enabled, a link will appear next to the Fundraiser Amount field.
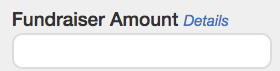
When the user clicks on that link, the widget will switch to detail view mode. (See below).
To exit detail view, the user can make use of the Back link in the upper right hand corner of the widget. This will take the user back to the main widget view.
<div id="pledgecents-fundraiser-widget-container"
	data-price="100"
	data-product-name="Deluxe Account (12 months)"
	data-details-enabled="true"
	data-goal-enabled="false"
></div>
Details Disabled
If detail view is disabled, there will be no small details link near the fundraiser amount input, and the user will not have the option to see the fee breakdown of their fundraiser.
<div id="pledgecents-fundraiser-widget-container"
	data-price="100"
	data-product-name="Deluxe Account (12 months)"
	data-details-enabled="false"
	data-goal-enabled="false"
></div>
Enabling/Disabling Goal Editing
Goal Editing Disabled (Recommended)
It is recommended that you remove the user's ability to edit the goal amount for their fundraiser. When a goal amount is set by you, the partner, all applicable fees are calculated and added to the initial goal amount. This ensures that the fundraiser goal will always be set to an amount that, if the fundraiser is successful, will give the user full access to the product or service they desire.
If goal editing is enabled, there is no guarantee that even with a successful fundraiser, the user will be able to afford access to the product or service they are raising funds for.
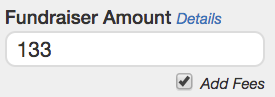
When goal editing is disabled, the user is unable to edit the fundraiser amount provided by you, the partner. The Add Fees checkbox is visible, but also unable to be edited or switched off by the user. Detail view will remain available to the user if it is enabled.
<div id="pledgecents-fundraiser-widget-container"
	data-price="100"
	data-product-name="Deluxe Account (12 months)"
	data-details-enabled="false"
	data-goal-enabled="false"
></div>
Goal Editing Enabled
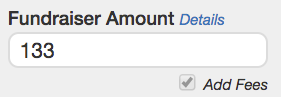
When goal editing is enabled, the user will have the ability to set their own fundraiser goal, and to remove the calculated fees from their fundraiser if they so choose.
If fees are enabled, they will be re-calculated and added to the total whenever the user sets a new fundraiser goal.
Detail view will remain available for the user if it is enabled.
<div id="pledgecents-fundraiser-widget-container"
	data-price="100"
	data-product-name="Deluxe Account (12 months)"
	data-details-enabled="false"
	data-goal-enabled="true"
></div>
Testing
Being able to test the integration of our widget into your site is important.
PledgeCents provides a very simple way to put your requests in 'testing mode'. Simply add the attribute data-testing with a value of true to the widget container as seen in the code sample on the right.
How is Testing Mode Different?
Any fundraiser created while the widget is in testing mode will only be accessible through the 'View My Fundraiser' button (i.e., is not visible to the general public), will not be able to receive investments, and will be removed from the site within 24 hours.
<div id="pledgecents-fundraiser-widget-container"
	data-price="100"
	data-product-name="Deluxe Account (12 months)"
	data-details-enabled="false"
	data-goal-enabled="true"
	data-testing="true"
></div>
Adding/Altering Other Form Data
The PledgeCents widget provides public functions to add or alter any form data for all user-editable fields.
First Name
The setNewPledgeCentsFirstName function takes in the desired first name as a string and can be used from anywhere within your JavaScript code.
setNewPledgeCentsFirstName("Sally");
Last Name
The setNewPledgeCentsLastName function takes in the desired last name as a string and can be used from anywhere within your JavaScript code.
setNewPledgeCentsLastName("Duval");
The setNewPledgeCentsEmail function takes in the desired email as a string and can be used from anywhere within your JavaScript code.
setNewPledgeCentsEmail("sduval@oaktree.hs");
School Name
The setNewPledgeCentsSchoolName function takes in the desired school name as a string and can be used from anywhere within your JavaScript code.
setNewPledgeCentsSchoolName("Oak Tree High School");
School Zip Code
The setNewPledgeCentsSchoolZip function takes in the desired name as a string and can be used from anywhere within your JavaScript code.
setNewPledgeCentsSchoolZip("91502");
What Does 'Add Fees' Mean?
PledgeCents collects a small fee from each fundraising page to cover payment processing.
When detail view is enabled, the user can view a breakdown of all applicable fees directly from the widget.
The Add Fees checkbox, when goal editing is enabled, allows the user to add or remove the added fees from their fundraiser goal amount. For reasons described above, PledgeCents highly recommends taking fees into consideration when setting a fundraising goal.
When a fundraiser goal amount is set using any of the methods mentioned in the section on setting a price, fees are automatically calculated and added onto the total fundraiser goal.